
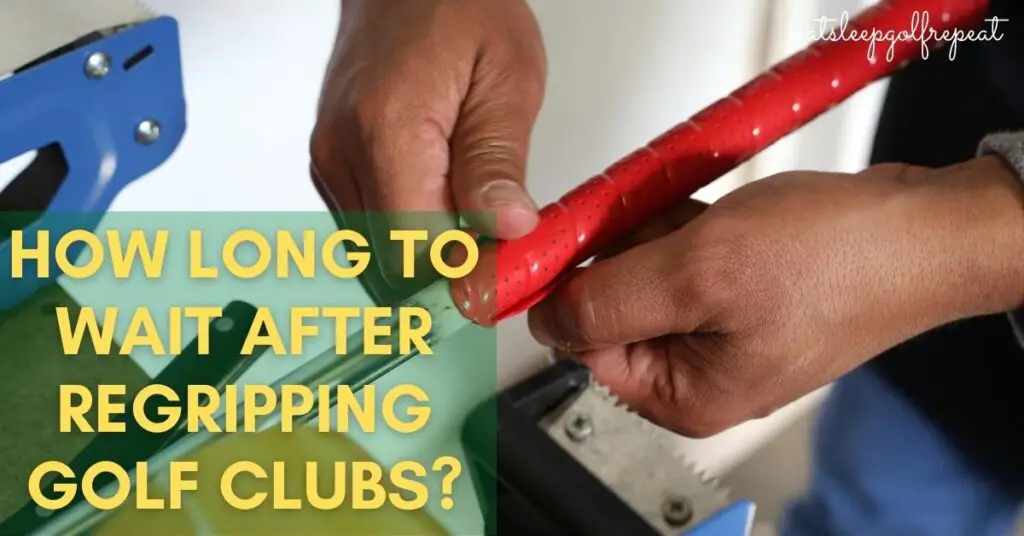
How Long To Wait After Regripping Golf Clubs?
If you’re anything like us, you’ll be keen to get straight out onto the golf course as soon as you have finished regripping those clubs.
Alright, it might be tempting but the truth is that you do need to give the adhesive time to dry before you start driving those balls into the distance.
But don’t worry, it’s not too long…
Once you have regripped your golf clubs, we would recommend waiting for at least six hours.
This gives the solvent enough time to properly cure so you don’t have to do the job all over again.
Not leaving golf clubs for long enough before using them is just one of the most common golf club regripping problems.
So, let’s take a look at this in a little more detail and discover some more of the most fatal mistakes you could make.
How Long Does It Really Take Before You Can Use Your Clubs?
The minimum length of time that we would suggest waiting after you have regripped your golf clubs would be six hours.
But the time could be longer, depending on how and where you have had the work done.
For example, if you have regripped the clubs at home then you will find information on the packaging of the grip that will tell you how long you should wait before playing.
In most cases, the manufacturer will recommend leaving the club overnight which, if you want to be picky, works out at between eight and twelve hours.
A lot of people choose to regrip their clubs at home as it is one of the more simple maintenance jobs that doesn’t always need a pro.
However, you might not fancy taking on the job yourself so heading to a professional is the obvious choice.
In this instance, you will drop your clubs off and they’ll do the work for you.
Typically, you’ll have an appointment to go and collect the clubs the following day, or the day after.
By this point, the grip solvent will be well and truly cured and ready for playing.
Do keep in mind that, while a professional will likely do the best job, you are going to end up paying more this way.
Not only will you be paying for the grip but for the time spent doing the work as well.
Why Do I Need To Regrip My Golf Clubs?
Regripping clubs is actually one of the most overlooked golf clubs maintenance aspects and a lot of us are guilty of leaving it too long.
As a rule of thumb, the average golfer should look to regripping their clubs at least once a season.
It’s probably easier to do this at the start of the season as then you won’t need to worry about it and you can get on with playing.
Over time your grips will become worn and if they aren’t replaced for some time then there is a chance that they will sustain more severe damage.
But this isn’t just an aesthetic problem.
Did you know that poor quality grips can lead to a decrease in your performance on the course?
When grips lose their traction, you have to grip the club more tightly which can reduce your control and as a result, your swing is not what it should be.
While there may be many things that could affect your swing, if you notice a sudden decrease in performance, it may be worth checking the state of your grips.
How To Regrip A Golf Club At Home
Owing to the fact that having your clubs regripped by a professional can be much more costly and that this isn’t a hugely time consuming job, you might choose to do it yourself.
But it is important to follow the correct process if you want the best results.
You’re going to need several things including a vice, shaft clamp, double-sided tape, grip solvent and a hook blade.
The first step is to remove the old grip as well as the old grip tape.
This is where your hook blade will come in handy but if you don’t have one then you’ll find it just as simple to use a regular, sharp knife. Be sure that, when you are cutting away the old grip, you move the blade in motions away from you to avoid causing an injury.
It can be helpful to place the golf club into a vice and a shaft clamp as this will keep everything stable while you work.
Not only will then make your life easier but it’ll also improve safety.
You can pick up a vice at almost any hardware or DIY store and they’re not the most expensive tool you’ll ever buy.
You can pick one up for around $20 but you may consider going up to the $80 mark for something very robust.
Once you have run the blade all the way along the old grip, you should find that it comes away pretty easily.
The next step is to take away the old grip tape which isn’t quite as smooth sailing as taking off the old grip.
In fact, this is potentially the most time consuming and tedious part of the job.
There are some people that will tell you to simply put the new tape over the top but this won’t give the best results and over time, it’s going to build up and then you’ll have an even bigger job on your hands!
Now that you have gotten the hard part out of the way, it’s time to measure the new grip tape.
There are two main types of grip tape; those that come in pre-cut strips or tape that is on a roll.
For the former, this step isn’t necessary but if you are using a roll then you will need to pull off and cut the correct length of tape.
For the simplest method, cut the tape into strips that are the same length as the grip.
It’s OK to have the tape a little shorter than the grip but try not to go much shorter than one inch.
Next, you’re ready to put the tape onto the shaft. You will notice that there are wax paper strips on either side of the tape and these both need to be removed.
When you have done this, put the tape onto the shaft lengthways.
However, try to leave up to half an inch hanging off the end of the shaft.
This will allow you to twist the overhanging tape and tuck it into the butt of the shaft.
You might think this just seems like a waste of tape; or time, but the truth is that it gives much better sealing at the end of grip.
More importantly than this, as you slide the new grip on, the presence of the tape will prevent any snagging or tearing.
Furthermore, having this tape here will stop any of the grip solvent from getting into the shaft.
Now it’s time to get your hands on the grip.
You can use grip solvent or mineral spirits; whichever you have or prefer.
You will need to spray this onto the shaft, and don’t be shy about using a lot.
Add as much as you need to ensure that all of the tape is adequately covered.
Once you have done this, you will need to add an amount inside the grip as well.
Pour some in and cover the end with your hand, shaking the grip to ensure the solvent is evenly distributed.
Next, you will need to slide the new grip onto the shaft and this can be one of the more tricky aspects of regripping.
It’s easy enough once you get the hang of it but this isn’t something that you can take your time on.
You see, as soon as you apply the solvent, it will begin to dry and this can make it very difficult to get the grip onto the shaft.
As soon as you have applied the solvent, open the mouth of the grip and slide it over the shaft.
When you do this, try to keep it as straight as you can.
Keep pushing until the shaft butt comes into contact with the end of the grip.
As soon as the grip is one, you will need to make any minor adjustments before the solvent begins drying.
Now, flip the club over and give the end of the grip a solid tap on the ground; this will ensure that it is properly sealed.
You might notice, at this point, that a little solvent comes out and that’s OK.
Other Common Mistakes When Regripping Golf Clubs
So, while using the clubs before the solvent has had enough time to dry is one of the most common regripping mistakes, it certainly isn’t the only one.
Throughout the regripping process, golfers often do things that can result in a less than desirable finish.
To avoid that, check out the following common mistakes.
- Leaving old grip tape on the shaft could mean that any new tape doesn’t adhere properly. What’s more, you may find that, once the grip is applied, there are areas that bulge out. If you keep doing this, the diameter of the grip will increase which may decrease how comfortable it is to hold, not to mention affecting how well you play.
- A lot of people forget to take off both layers of wax paper on the grip tape. If you then apply solvent over this, it isn’t going to have an effect. You may then go as far as installing the new grip but the sad thing is that, once installed, you cannot take it off again. The wax paper won’t create a secure bond and your only option will be to cut off the new grip and start again with a fresh one. More money and more time spent! Even more shocking is that, without the secure bond, there is a chance that the grip will slide off during play which could cause a serious injury.
- Some people are afraid of using too much grip solvent but scrimping on it will make it much harder to get the grip on. Solvent is not only an adhesive but it also acts as a lubricant so that as you slide the grip down, there is less resistance. Not applying enough could mean that the grip gets stuck halfway.
- When installing the new grip, it is vital not to push it on at an angle. If you do this, even slightly, then there is a risk of the grip breaking. Moreover, the angle of entry will mean that some solvent is rubbed off which will decrease how smoothly the grip goes on.
Conclusion
Regripping your golf clubs is something that you will have to have done regularly over your golfing career.
Failing to do this can impact how well you play but whether you decide to do it yourself or take your golf clubs to a professional, it is important to allow the grip solvent time to cure.
Generally speaking, a minimum of six hours is required but to be absolutely sure, most manufacturers of grips suggest waiting overnight; between eight and twelve hours.
Not waiting for this length of time is just one of the most common regripping mistakes, so be sure to stick to our tips to ensure the best success.
If your clubs are getting old you can always trade your golf clubs in, and look into choosing another set.